|
Astrophotography - Shooting star trails
There are several ways to shoot the stars for different effects. This article looks at star trails and the conditions, equipment and techniques for creating amazing images like this:
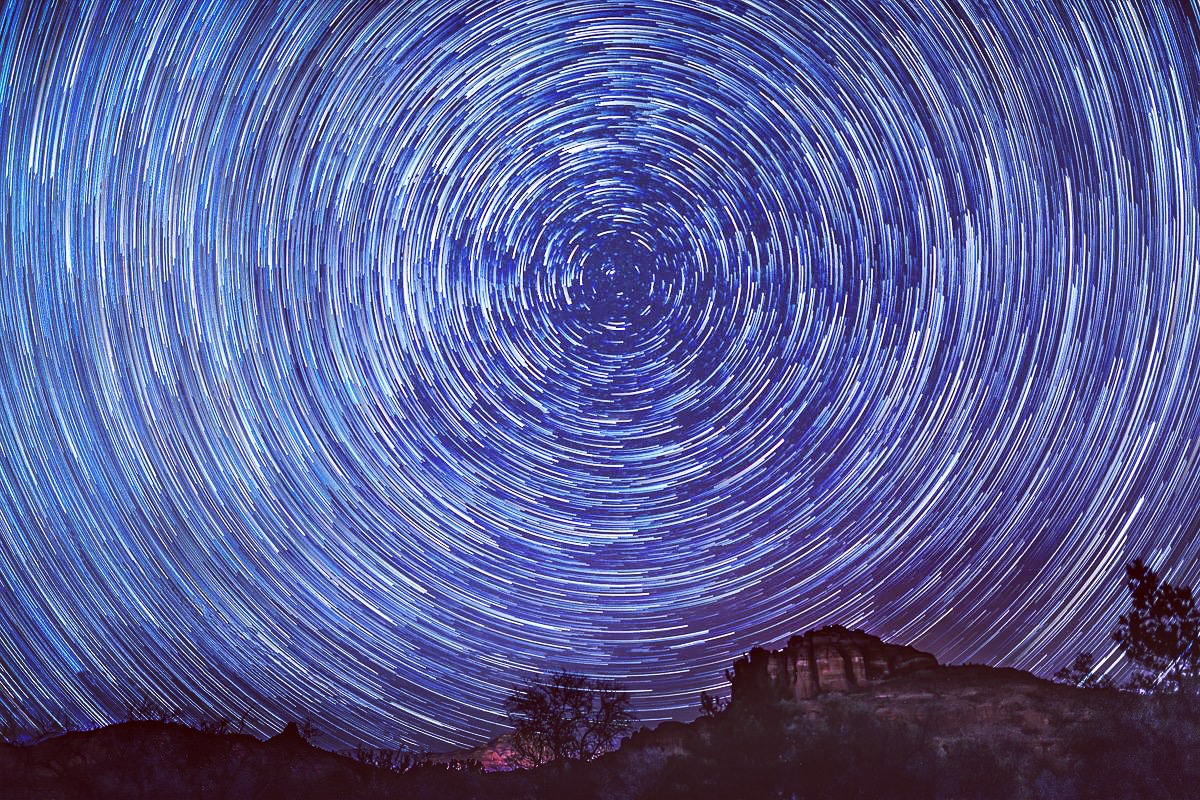 This picture was taken in Sedona, Arizona in January by one of our staff members. The desert is very cold at night so be sure to wrap up in warm clothes. This image is a stack of over 200 shots taken over 2 and a half hours so plan to be out there a while! Equipment you will need: Camera with full manual control. Fully charged battery/spare. Wide angle lens, ideally with an aperture of 2.8 or wider. Gaffers tape (optional). An intervalometer (if not built in to the camera itself). Sturdy tripod. A flashlight, preferably tungsten. Lens cloth (for lens condensation). A stargazing app for your mobile phone is also a helpful accessory but is not essential. Apps like.....TPE, PhotoPills, Stellarium or SkyView can help you identify constellations, stars and direction as well as plan for moon rise and set. General Cold, clear nights often exist alongside winter skies and are great for astrophotography in general but that doesn't mean summers can't work, it just means you have to stay up later! Also, light pollution is the enemy of star trail photography. City lights will drown out the stars. A location away from airports is desirable to avoid the trails left by aircraft. Timing is also something to consider - many more stars will be visible during the new moon phase when skies are darker. You can check the moon phase by using an app like "Moonphase" or by visiting https://www.almanac.com/astronomy/moon/calendar. Camera settings Shoot in RAW. (for more post processing options - more later) Auto white balance or Tungsten Set mode to manual Widest aperture your lens will allow Shutter speed "bulb" (you are going to control your shutter with the intervalometer) ISO 100 or lowest native ISO Evaluative (Canon) or matrix (Nikon) metering mode Long exposure noise reduction off If possible, try to scout out your location in daylight. While your shot is all about the stars, it helps to have something interesting in your foreground in terms of an anchor and to give a sense of scale and interest. Compose your shot before it gets dark and establish focus at infinity. Once focused, switch your camera/lens to manual focus and secure the focus ring with the gaffers tape if you have it - this just avoids accidentally knocking the lens out of focus. If you want to achieve the circular effect shown in the image, you will need to compose in a way that places Polaris, the North Star, in the center of the image. All stars appear to rotate around Polaris but it is actually the earths rotation creating this effect. True night time is achieved after astronomical twilight so the stars are most visible at this time. You might want to go ahead and run off a few shots during twilight however to use later in processing, especially of foreground details. When you are ready to begin shooting, run a test shot to check for exposure and focus. Use live view and zoom in on the image to check the stars are in focus. You should check that your histogram shows detail in left third of the chart. Do not rely on your LCD screen to judge exposure. Your eyes will deceive you. Assuming all is good, it is time to start the intervalometer. It really helps if you have set this up beforehand - it saves fumbling around in the dark! Refer to the instruction manual for the camera or device, depending on which you are using. You will be taking multiple exposures and combining them in post processing. While each camera is different, try setting each exposure for 25 seconds with an interval of 2 seconds to allow for buffering and set the total number of exposures to whatever time you wish to allocate. Set the camera to go with a fully charged battery and enjoy the night. It is really a great time to feel how small we really are, just a tiny part of our great Universe. Check your lens once in a while for condensation build up. If you do need to wipe it, be sure not to move anything. That's all there is to it! You have your images. Next you just need to process them. You will import the images to your computer and batch edit to create a white balance(for raw files)/exposure that you are happy with. Adding clarity is a great way to make the star trails stand out. Correct for lens distortion and chromatic aberrations if available to you also. There are a number of ways to stack your images, including Photoshop. This shot used StarStax which is free software created by Markus Enzweiler. You will need to convert your images to jpegs at this point. https://www.markus-enzweiler.de/software/software.... Once installed, the software really is very easy to use. Just drag and drop the jpegs and run the program - you will see the stack appearing before your eyes! Play around with it, there are a number of settings you can try, including comet mode which gives the comet like trails to the stars, as above. Save your image and consider whether further editing is needed - perhaps you have an aircraft trail you want to remove etc. Have fun with this and please show us your shots, we would love to see them! You can tag us on Facebook and Instagram too! LensGiant has a great selection of cameras available for rent with built in intervalometers. If you need help selecting equipment, please give us a call or you can rent here. |